 Skip to content

By making your own personalized memorial candles, you imbue the ritual with deeper significance.
Candles have long been a symbol of remembrance, hope and connection. Throughout history, people have lit candles to honor loved ones, guide spirits and create sacred atmospheres. In times of grief, the gentle flame of a candle can bring comfort, provide a focal point for reflection, and invite warmth into spaces that feel cold without our loved one’s presence. Making your own memorial candles deepens this ritual, allowing you to infuse the light with intentionality, personal meaning and creativity. This article explores the significance of candle-lighting in mourning, provides detailed instructions for creating personalized candles, and suggests ways to incorporate them into memorial practices.
The Symbolism of Candles in Mourning
Candles serve multiple symbolic functions in grief and remembrance:
-
Light in Darkness: Lighting a candle represents bringing light to darkness, both literally and metaphorically. It acknowledges that even amid sorrow, there is still hope and guidance.
-
Presence and Connection: Many people feel that a burning candle symbolizes their loved one’s spirit or presence. Watching the flame flicker can evoke a sense of closeness and conversation.
-
Prayer and Intention: In various traditions, lighting candles is a way to send prayers or thoughts to the deceased. The act marks an intentional moment of connection.
-
Transformation: Wax turning to flame and smoke illustrates transformation—an echo of life transitioning into memory.
-
Continuity: Candles burn steadily over time, symbolizing the enduring nature of love and memory.
Crafting your own candles adds another layer of meaning: you choose the color, scent, container and decoration that reflect the person you’re honoring, making each candle unique.
Benefits of Making Memorial Candles
-
Personalization: DIY candles can incorporate favorite colors, scents and symbols associated with the deceased. You can add names, dates, quotes or photos to the candle container.
-
Therapeutic Process: The act of melting wax, blending fragrances and decorating the candle can be calming. It engages your senses and gives your hands something purposeful to do.
-
Creative Expression: Candle-making allows you to express grief creatively. Experimenting with colors, shapes and designs can be a form of art therapy.
-
Shared Activity: Making candles with family or friends fosters connection. Sharing stories while pouring wax becomes part of the ritual.
-
Sustainable Keepsake: Unlike store-bought memorial products, DIY candles are one-of-a-kind. When the candle burns down, you can refill it or save the container as a memento.
Gathering Materials and Tools
Before starting, gather your supplies. Many craft stores carry candle-making kits, or you can purchase individual components online. Basic items include:
-
Wax: Soy wax is eco-friendly, burns cleanly and is beginner-friendly. Beeswax has a natural honey scent and longer burn time. Paraffin wax is traditional and often less expensive but may emit more soot.
-
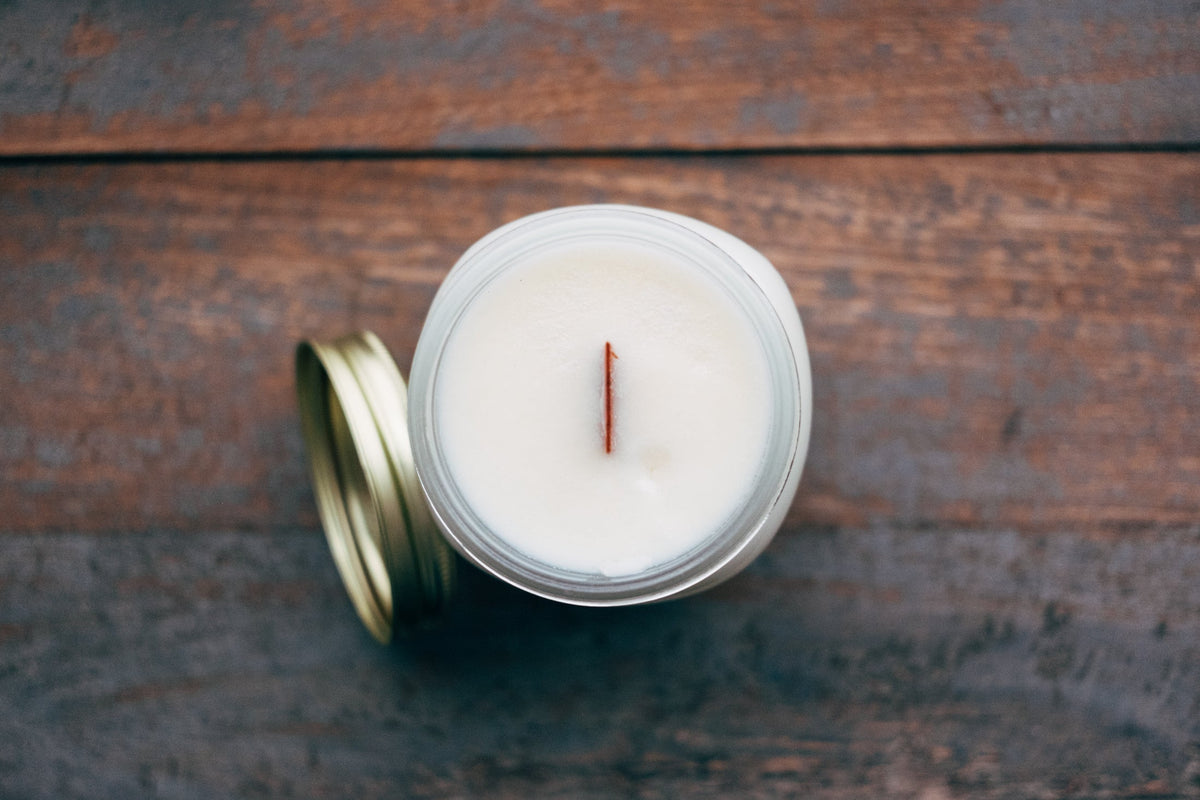
Wicks: Choose pre-waxed wicks with metal tabs. The wick size depends on the diameter of your candle; larger candles need thicker wicks. Wooden wicks create a crackling sound reminiscent of a fireplace.
-
Containers or Molds: Mason jars, glass tumblers, ceramic holders or tins work well. Ensure they are heat-resistant and have smooth interiors. For pillar candles, use silicone molds.
-
Fragrance Oils or Essential Oils: Select scents connected to your loved one—lavender for relaxation, rose for love, sandalwood for earthiness. Use oils designed for candles to ensure safe burning.
-
Colorants: Candle dyes or chips tint the wax. Avoid food coloring; it doesn’t mix properly with wax. Natural colorants like mica powder or powdered herbs add subtle hues.
-
Additives (Optional): Dried flowers, herbs, crystals or biodegradable glitter can be added for decoration. Ensure they are safe to burn or place them on the surface where they won’t catch fire.
-
Double Boiler: Melt wax safely using a double boiler. You can create one by placing a metal or glass measuring cup inside a pot of simmering water.
-
Thermometer: Wax must reach specific temperatures for mixing fragrance and pouring. A candy or candle-making thermometer is essential.
-
Heat Gun or Hair Dryer: To smooth the top of the candle if it cools unevenly.
-
Glue or Wick Stickers: Attach wicks to the bottom of containers.
Gathering these items in advance helps the candle-making process flow smoothly.
Step-by-Step Guide to Making a Memorial Candle
1. Prepare Your Workspace
Cover your work area with newspaper or a silicone mat to catch spills. Arrange your tools within reach. Ensure proper ventilation, especially when adding fragrance.
2. Choose and Prepare Your Containers
-
Wash and dry containers thoroughly.
-
Attach the wick: Place a wick sticker or a small dot of hot glue on the metal tab. Stick it to the center of the container’s bottom. Use a wick holder, chopstick or pencil across the top of the container to keep the wick centered and upright.
-
If using molds for pillar candles, place the wick through the mold’s hole and secure it with a rubber band or wick bar on top. Seal any gaps at the bottom to prevent leakage.
3. Measure and Melt Wax
-
Measure the wax. A common rule is to fill your container with wax flakes, then double it. Wax reduces in volume when melted.
-
Fill the bottom pot of your double boiler with water and place it on medium heat.
-
Put wax flakes into the top pot or measuring cup. Heat slowly, stirring occasionally with a wooden spoon or heat-safe spatula.
-
Monitor the temperature. Soy wax melts around 120–180 °F (49–82 °C). Beeswax melts at about 145–170 °F (63–77 °C). Don’t overheat.
4. Add Fragrance and Color
-
Once the wax has melted completely, remove it from heat and allow it to cool slightly to around 160 °F (71 °C) for soy or 150 °F (65 °C) for beeswax.
-
Add your chosen candle dye or color chips. Stir until the color is evenly distributed. Start with a small amount; you can always add more.
-
Next, add fragrance oil. A common ratio is 1 ounce of fragrance per 1 pound of wax (or follow manufacturer recommendations). Stir gently for 2 minutes to ensure even distribution.
5. Pour the Wax
-
Pour the scented, colored wax slowly into your prepared container or mold. Leave a bit of space at the top (around ¼ inch) to allow for expansion.
-
Avoid moving the container once poured to prevent uneven cooling. Allow the candle to cool at room temperature for several hours. A frosted appearance is normal for soy wax.
6. Add Decorative Elements (Optional)
-
If you want to add dried flowers, herbs or small crystals, wait until the wax has formed a thin skin on top but is still soft underneath. Gently press decorations onto the surface. Be cautious—anything you add must be fire-safe. Place items toward the edges, away from the wick, so they don’t catch fire.
-
Sprinkling a tiny amount of biodegradable glitter on top can create a subtle shimmer.
7. Smooth and Finish
-
As candles cool, they may form sinkholes or uneven tops. Use a heat gun or hair dryer to carefully melt the top layer, allowing it to smooth out.
-
Once fully cooled (after 4–24 hours), trim the wick to about ¼ inch.
-
If you’ve used a mold for a pillar candle, remove it carefully once the candle is completely firm. Smooth any rough edges with a warm spoon or your fingers.
8. Cure the Candle
For optimal scent throw and burning, allow your candle to cure—sit undisturbed—for at least 48 hours for soy wax and up to a week for beeswax. This process allows the fragrance to bond with the wax.
Personalizing Your Memorial Candle
Personal touches make your candle truly meaningful:
-
Labels and Tags: Create a label with your loved one’s name, a significant date and a quote, poem or song lyric. Use decorative paper, calligraphy or print labels on sticker paper.
-
Photos: Attach a small photo to the container. If using glass, print a transparent sticker or slide the photo between the glass and an outer layer like a candle sleeve.
-
Colors: Use colors that evoke memories—blue for calm, green for their love of nature, gold for warmth. You can layer colors by pouring wax in stages and allowing each layer to cool slightly before adding the next.
-
Scents: Choose fragrances reminiscent of your loved one’s perfume, favorite flower or a place they loved. Blend scents to create a bespoke fragrance: for example, lavender and vanilla for comfort, or cedar and citrus for freshness.
-
Embedded Objects: Consider embedding a small charm or note inside the candle (near the top) that appears as the candle burns. Ensure the item is fireproof or positioned so it doesn’t contact the flame.
-
Handwritten Messages: Use a permanent marker to write a message on the candle’s bottom or tie a handwritten tag around the neck with ribbon or twine.
Personalization transforms a simple candle into a heartfelt keepsake.
Incorporating the Candle into Memorial Rituals
Once your memorial candle is ready, integrate it into rituals that honor your loved one:
-
Daily Remembrance: Light the candle for a few minutes each day, perhaps in the morning to start your day with connection, or in the evening when you need calm. Use this time to sit quietly, reflect or speak to your loved one.
-
Anniversaries and Holidays: Burn the candle during birthdays, anniversaries or holidays that feel difficult. Invite family members to share memories around the candlelight.
-
Meditation and Prayer: Use the candle flame as a focal point during meditation or prayer. Focus on the light and your breath, allowing thoughts of your loved one to flow.
-
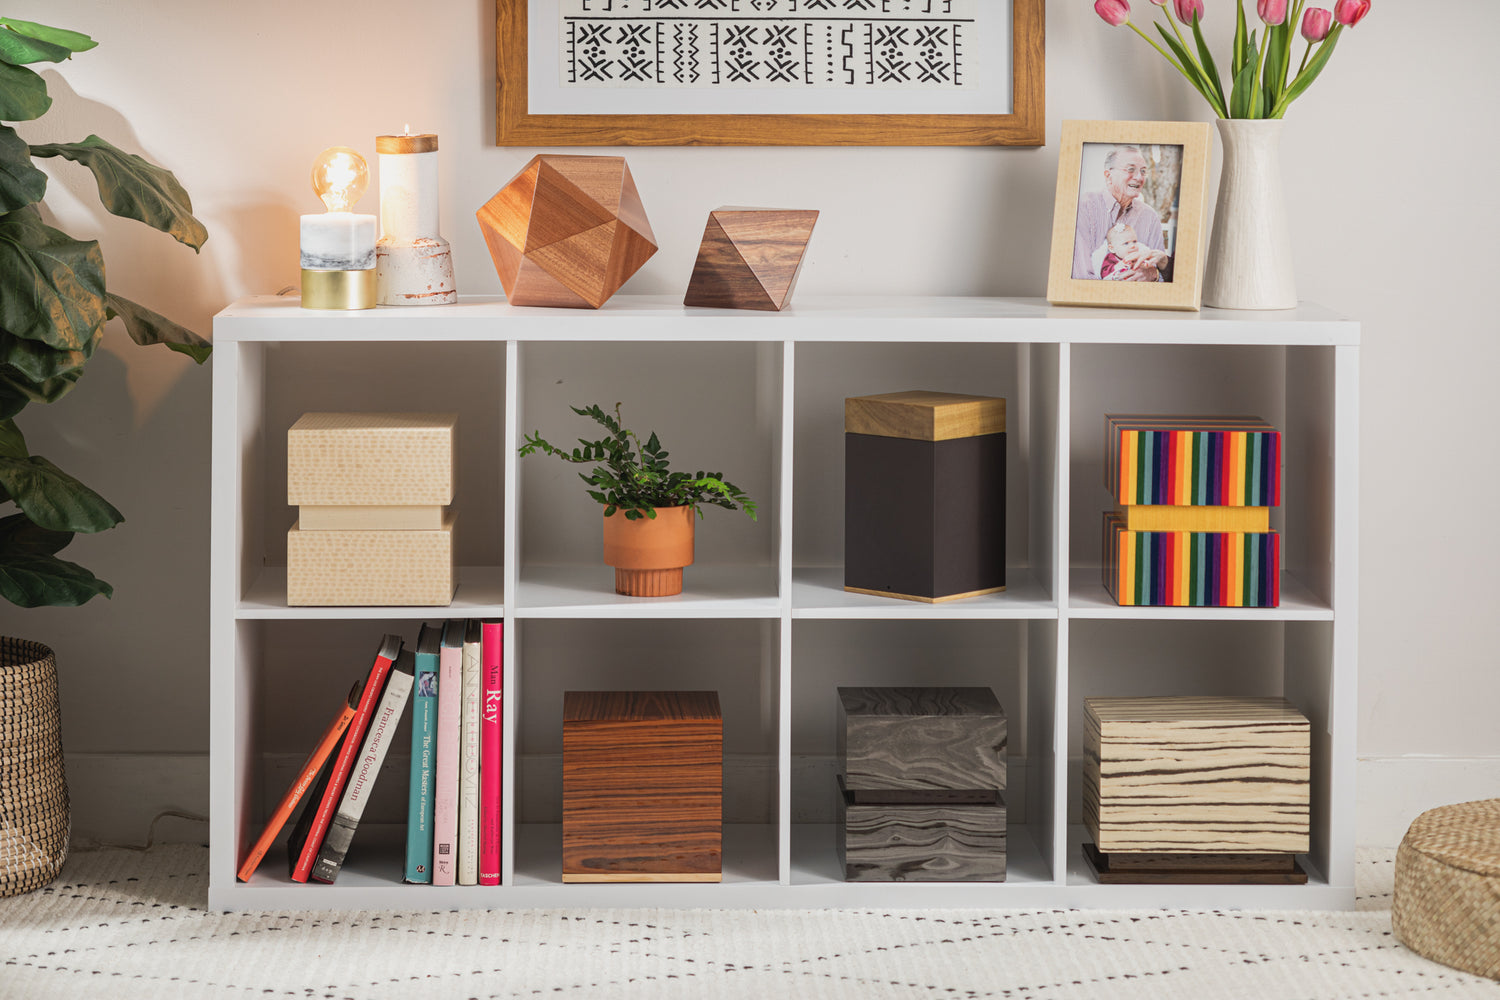
Memory Table: Place the candle on a memorial table or altar along with photos, flowers, letters and objects associated with your loved one. This dedicated space serves as a sanctuary for reflection.
-
Group Gatherings: During gatherings or memorial services, distribute smaller candles made from the same batch to friends and family. Light them together as a symbol of collective remembrance.
-
Outdoor Ceremonies: Use windproof containers or hurricane lanterns if you wish to light the candle outdoors—perhaps at a favorite location like a beach, garden or mountain. Be aware of fire regulations and safety.
-
Combining Rituals: Incorporate your candle into other healing practices, such as art therapy or meditation. For example, light the candle while painting memory stones or writing letters.
Ritualizing candle-lighting provides structure and comfort. Over time, these rituals may become cherished routines that keep your loved one’s memory alive.
Safety Considerations
When making and burning candles, safety is paramount:
-
Watch the Melt Pool: Burn your candle long enough for the wax to melt across the entire surface (usually 1 hour per inch of diameter) to prevent tunneling. Extinguish if the melt pool becomes too deep, to avoid overheating the container.
-
Never Leave Unattended: Always extinguish candles when you leave a room or go to sleep. Keep candles away from flammable materials like curtains, paper and fabric.
-
Keep Away from Children and Pets: Place candles out of reach of children and pets. Curious paws and hands can knock them over.
-
Trim the Wick: Keep wicks trimmed to ¼ inch before each use. Long wicks can cause high flames and excessive smoke.
-
Use Heatproof Surfaces: Burn candles on surfaces that can withstand heat. Avoid placing them directly on wood or glass without a coaster or plate.
-
Don’t Move Burning Candles: Wax and containers become hot. Allow candles to cool before moving or touching them.
-
Proper Ventilation: Burn candles in rooms with adequate ventilation to disperse fragrance and prevent carbon monoxide buildup.
When making candles:
-
Use a Thermometer: Overheating wax can lead to fire or discolored candles. Follow temperature guidelines.
-
Avoid Water Contact: Water can cause wax to splatter when it’s hot. Keep your workspace dry.
-
Clean Spills Carefully: Wipe spilled wax with paper towels while it’s still warm. Once it hardens, scrape gently and clean with hot water and soap.
Following safety guidelines ensures that your candle-making and burning experience remains peaceful and hazard-free.
Alternative Candle Projects
If you’re short on time or resources, consider these simplified memorial candle projects:
-
Decorated Store-Bought Candle: Purchase a high-quality pillar or jar candle. Decorate the exterior with ribbons, charms, pressed flowers or decals. Add a personalized tag.
-
Rolled Beeswax Candle: Warm sheets of beeswax with a hairdryer to make them pliable. Place a wick at one edge and roll tightly. These natural candles are quick to make and have a lovely honey scent.
-
Gel Candles: Transparent gel wax allows you to embed objects like shells, stones or small charms that become visible through the candle. Use containers that showcase the design.
-
Floating Candles: Melt wax into molds shaped like flowers or hearts. Place them in a bowl of water with flower petals for a serene table centerpiece.
These projects provide easier alternatives while maintaining the personalized touch.
Sharing and Gifting Memorial Candles
Memorial candles can extend beyond personal use. Sharing them with others spreads warmth and remembrance:
-
Family and Friends: Gift candles to those who also loved the person who passed. Include a note explaining the significance of the color, scent and decorations.
-
Charity Fundraisers: Make candles to sell at memorial events, with proceeds benefiting a cause your loved one cared about. It’s a meaningful way to honor their legacy while supporting a cause.
-
Support Groups: Bring candles to grief support meetings. Lighting them at the start of each session can signify a shared space of healing.
-
Community Vigils: If your community holds a vigil, contribute homemade candles for attendees. Personalized candles can bring a sense of intimacy to large gatherings.
When gifting candles, include instructions on safe burning and an explanation of how and why you made them. Sharing your process can inspire others to create their own rituals.
Conclusion
The simple act of lighting a candle holds profound meaning when grieving a loved one. By making your own personalized memorial candles, you imbue the ritual with deeper significance. Choosing wax, selecting fragrances, adding colors and decorations, and pouring your intentions into the wax create a unique tribute that reflects the essence of the person you’re honoring. Once complete, these candles become companions in daily rituals, meditation and memory, offering light and comfort when you need it most.
Candle-making is accessible to beginners, offers therapeutic benefits and results in heartfelt keepsakes that you can use or share. Whether you craft a single jar candle with a photo label or a set of layered scented candles for family members, the process itself is a healing journey. Through flame and fragrance, you celebrate the life of your loved one and find solace in the flickering glow of remembrance.


Our Best Selling Collection
Frequently Asked Questions
What are the shipping options for my memorial?
Oaktree offers free nationwide shipping on all urns and cremation jewelry items, with delivery typically taking 2-5 business days, including processing time. Need it sooner? Expedited shipping (overnight or 2-day) is available at checkout for an additional cost, and we will also prioritize processing for faster delivery. If you need international shipping, please contact us first to confirm availability and rates.
How long will it take for my engraved item to arrive?
Engraved urns and cremation necklaces require an additional 1-3 business days for personalization before shipping. If you need faster delivery, please contact us—we’ll do our best to expedite processing and accommodate your timeline. Expedited shipping options are also available at checkout to ensure your memorial arrives as soon as possible.
What do I do if I never received my order?
If your order hasn’t arrived within 10 business days, please contact us so we can track your shipment and resolve any issues. We’ll ensure your memorial reaches you as soon as possible.
What do I do if I received a defective order?
If your order arrives damaged or defective, contact us right away. We take pride in our high-quality craftsmanship and will work quickly to replace or repair your item at no additional cost.
Can I return my urn or cremation necklace? What is your return policy?
Oaktree offers a 100-day return and exchange policy for non-engraved items. Due to personalization, engraved urns are final sale and cannot be returned. For full details on how to start a return or exchange, visit our Returns & Exchanges page.
How do I make changes to an urn I’ve already ordered?
If you need to modify an order, contact us as soon as possible. If your urn is already engraved, we may not be able to make changes, but we’ll do our best to accommodate your request before processing.
How are your urns made? Where do the materials come from?
Oaktree’s urns are handcrafted in the USA and Europe using sustainable, locally sourced materials. Our artisans ensure each piece is beautifully designed and built to honor your loved one’s memory with care.
How do I choose the right urn size?
Each product page includes detailed dimensions, weight capacity, and cubic inches to help you select the right urn. As a general guide, 1 cubic inch holds 1 pound of pre-cremation weight. If you need help choosing, feel free to contact us.
Some urns are marked as “sold out.” When will they be available?
Our handmade urns may take a few weeks to restock. If you’re interested in a specific style, contact us for an estimated restock date, and we’ll notify you when it’s available.
Does Oaktree place the ashes into my urn?
Yes, we offer an optional ash transfer service for an additional fee. If you’d like us to handle this process, please contact us when placing your order. You’ll need to mail the ashes to us, and we’ll carefully transfer them into your selected urn.
How do I transfer ashes into my urn?
Cremated remains typically arrive in a sealed plastic bag inside a plastic container. To transfer them, simply place the sealed bag inside your urn. If needed, use a funnel for precise placement. If you have any concerns, our team is happy to assist.
How do I order an engraved urn?
To personalize your urn, select “Yes” under “Would you like your item engraved?” on the product page. If you’d like a custom design beyond standard engraving, contact us and we’ll explore options to create a unique tribute.
Can my urn be shipped directly to a funeral home?
Yes! During checkout, you can enter the funeral home’s address for direct shipping.
Can I customize my urn beyond engraving?
Yes! In addition to engraving, we offer custom design services, including unique finishes, symbols, or artwork. If you’d like to personalize your urn beyond standard options, contact us to discuss customization possibilities.
What materials are Oaktree urns made from?
Our urns are crafted from premium materials such as wood, ceramic, marble, metal, and biodegradable materials. We focus on sustainable sourcing and high-quality craftsmanship to create lasting memorials.
Do you offer keepsake urns or mini urns?
Yes, we offer keepsake urns and mini urns, which are smaller versions designed for sharing ashes among family members or keeping a small portion as a personal tribute.
Can I pre-order an urn for future use?
Absolutely! Many customers choose to pre-order an urn in advance. This ensures availability and allows for customization without time constraints. Contact us to arrange a pre-order.
Do you offer pet urns?
Yes, we provide a range of pet memorial urns designed to honor beloved pets. These are available in different materials and sizes to suit dogs, cats, and other pets.
How do I clean and maintain my urn?
Urns require gentle care to maintain their beauty. Use a soft cloth and mild cleaner for metal or ceramic urns. Avoid direct sunlight and moisture to preserve wood urns. Contact us for specific care instructions based on your urn’s material.
Can I travel with an urn? Are they TSA-approved?
Most Oaktree urns are TSA-compliant, making them safe for air travel. Choose a non-metal urn to ensure easy screening. We recommend carrying the urn in your carry-on bag and bringing the cremation certificate from the funeral home.
How do I track my order?
Once your order ships, we’ll send you a tracking number via email. You can use this to monitor the shipment status. If you don’t receive tracking details, contact us for assistance.
How do I contact Oaktree if my question isn’t answered here?
We’re happy to assist! Visit our Contact Us page to reach us via email, chat, or phone. Our compassionate team is ready to help.