Are the wood urns proper for burial? Meaning do they break down and how long before the urn would break down? Trying to choose the right one. THank you in advance. Sharon Carlson

Our urns are handcrafted by a team of artisans using sustainably-sourced, FSC-certified woods and are elegantly designed as an accent to your home without alluding to its actual purpose. Below we’ve outlined what the production process looks like before your urn arrives at your home to serve as a beautiful memorial for your loved one.
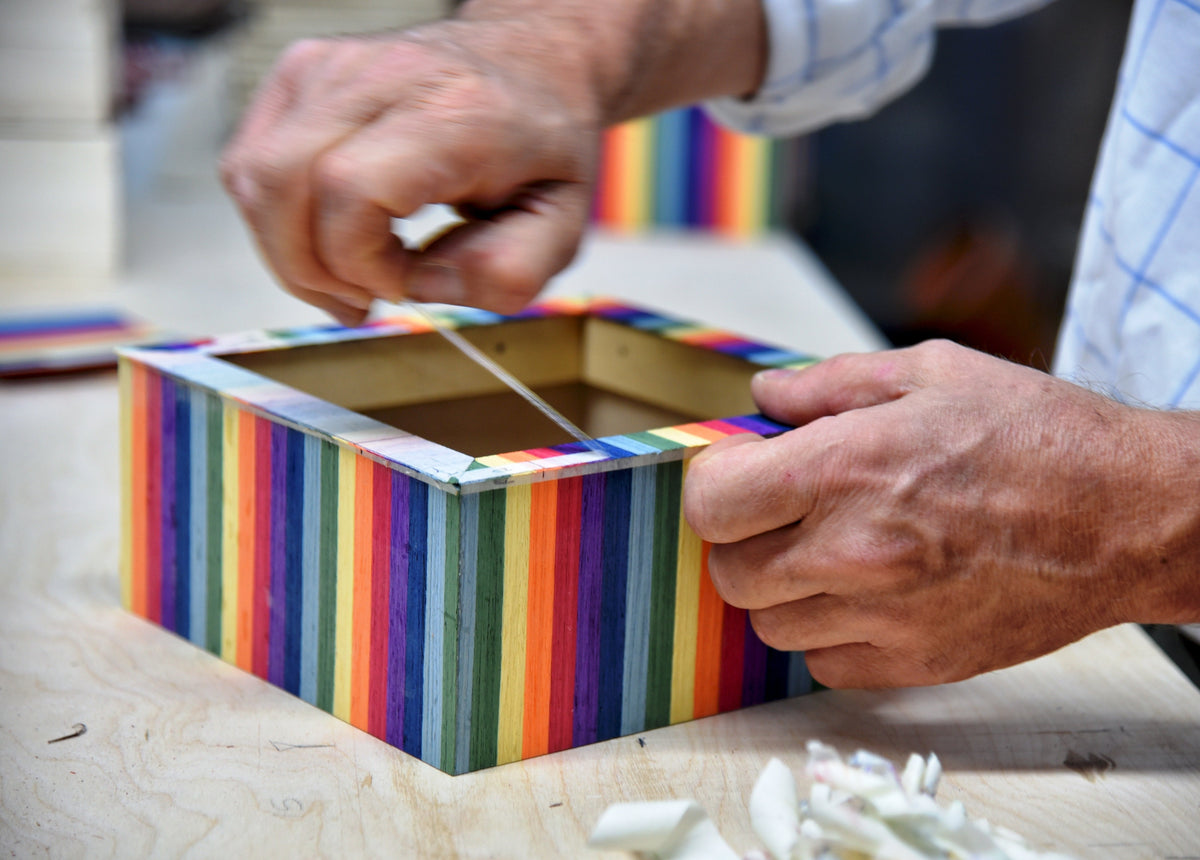
Step One: Cutting and Adhering the Veneer
To begin, the artisan cuts a thin, decorative covering from fine wood, called veneer. It’s critical for the artisan to pay close attention to the design in order for the veneer to match on each corner of the urn. This is especially important with our Bleecker urn, which is made up of eight sides. Matching each side ensures that the final product has a sleek appearance.
After the veneer is cut, the artisan then glues it to a thicker, coarser piece of wood for stability.
Step Two: Securing the Veneer in the Press
After the veneer is secured to the thicker piece of wood, it’s moved to a machine called a pressa. The pressa is set up to use just the right amount of pressure to ensure that all air bubbles are pushed out and the veneers are securely attached.
Step Three: The First Sanding

When the urn comes out of the pressa, it is then sanded to remove any loose fibers or excess glue. This course sanding is a vital step in the preparation process that allows the varnish to later set properly.
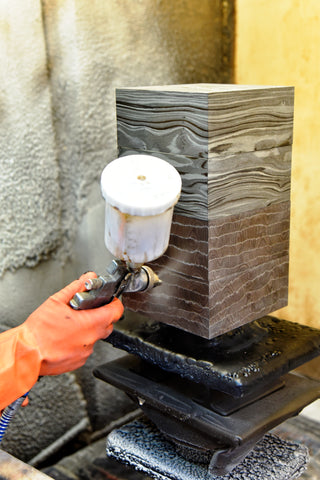
Step Four: Varnish

After this initial sanding, the urn is ready for varnish. It’s first covered with an isolating varnish, then allowed to dry. Next, it’s sprayed again with another layer of varnish. This process is repeated several times.
The top of the urn gets five coats of varnish, while the lateral facades get seven. This step takes the longest, as it’s important to ensure that each layer of varnish dries completely. After several layers and several days of drying, the urn is ready for the next step.
Step Five: Round Two of Sanding

Next, the urn is sanded once more. This will create an extremely smooth surface. This fine sanding is one of the most crucial steps when it comes to creating a finish that is as close to perfect as possible. After the ideal finish is achieved, the urn is ready to be polished.
Step Six: Polish

Before the polishing process can begin, the artisan cleans the polishing machine to eliminate the risk of contamination to the urn’s finish.
Once the cleaning process is complete, the urn is polished three times to achieve a “mirrored effect”. This shiny, sleek mirror effect is a staple of all of our Oaktree urns.
Step Seven: Accessorizing

After the polishing is complete, some urns are immediately ready for purchase, while some have additional details added such as a Florentine velvet lining or a removable tray.
The Completed Product

Each of our urns undergoes this meticulous production process to produce only the best memorial for your loved one.
Oaktree urns are manufactured in the United States and in Europe. We offer urns in ceramic, marble and wood in several different sizes to ensure the right fit. Our urns can also be engraved to add the perfect, personal touch to your loved one’s final resting place.
Comments
Are the wood urns proper for burial? Meaning do they break down and how long before the urn would break down? Trying to choose the right one. THank you in advance. Sharon Carlson
What are the shipping options for my memorial?
Oaktree offers free nationwide shipping on all urns and cremation jewelry items, with delivery typically taking 2-5 business days, including processing time. Need it sooner? Expedited shipping (overnight or 2-day) is available at checkout for an additional cost, and we will also prioritize processing for faster delivery. If you need international shipping, please contact us first to confirm availability and rates.
How long will it take for my engraved item to arrive?
Engraved urns and cremation necklaces require an additional 1-3 business days for personalization before shipping. If you need faster delivery, please contact us—we’ll do our best to expedite processing and accommodate your timeline. Expedited shipping options are also available at checkout to ensure your memorial arrives as soon as possible.
What do I do if I never received my order?
If your order hasn’t arrived within 10 business days, please contact us so we can track your shipment and resolve any issues. We’ll ensure your memorial reaches you as soon as possible.
What do I do if I received a defective order?
If your order arrives damaged or defective, contact us right away. We take pride in our high-quality craftsmanship and will work quickly to replace or repair your item at no additional cost.
Can I return my urn or cremation necklace? What is your return policy?
Oaktree offers a 100-day return and exchange policy for non-engraved items. Due to personalization, engraved urns are final sale and cannot be returned. For full details on how to start a return or exchange, visit our Returns & Exchanges page.
How do I make changes to an urn I’ve already ordered?
If you need to modify an order, contact us as soon as possible. If your urn is already engraved, we may not be able to make changes, but we’ll do our best to accommodate your request before processing.
How are your urns made? Where do the materials come from?
Oaktree’s urns are handcrafted in the USA and Europe using sustainable, locally sourced materials. Our artisans ensure each piece is beautifully designed and built to honor your loved one’s memory with care.
How do I choose the right urn size?
Each product page includes detailed dimensions, weight capacity, and cubic inches to help you select the right urn. As a general guide, 1 cubic inch holds 1 pound of pre-cremation weight. If you need help choosing, feel free to contact us.
Some urns are marked as “sold out.” When will they be available?
Our handmade urns may take a few weeks to restock. If you’re interested in a specific style, contact us for an estimated restock date, and we’ll notify you when it’s available.
Does Oaktree place the ashes into my urn?
Yes, we offer an optional ash transfer service for an additional fee. If you’d like us to handle this process, please contact us when placing your order. You’ll need to mail the ashes to us, and we’ll carefully transfer them into your selected urn.
How do I transfer ashes into my urn?
Cremated remains typically arrive in a sealed plastic bag inside a plastic container. To transfer them, simply place the sealed bag inside your urn. If needed, use a funnel for precise placement. If you have any concerns, our team is happy to assist.
How do I order an engraved urn?
To personalize your urn, select “Yes” under “Would you like your item engraved?” on the product page. If you’d like a custom design beyond standard engraving, contact us and we’ll explore options to create a unique tribute.
Can my urn be shipped directly to a funeral home?
Yes! During checkout, you can enter the funeral home’s address for direct shipping.
Can I customize my urn beyond engraving?
Yes! In addition to engraving, we offer custom design services, including unique finishes, symbols, or artwork. If you’d like to personalize your urn beyond standard options, contact us to discuss customization possibilities.
What materials are Oaktree urns made from?
Our urns are crafted from premium materials such as wood, ceramic, marble, metal, and biodegradable materials. We focus on sustainable sourcing and high-quality craftsmanship to create lasting memorials.
Do you offer keepsake urns or mini urns?
Yes, we offer keepsake urns and mini urns, which are smaller versions designed for sharing ashes among family members or keeping a small portion as a personal tribute.
Can I pre-order an urn for future use?
Absolutely! Many customers choose to pre-order an urn in advance. This ensures availability and allows for customization without time constraints. Contact us to arrange a pre-order.
Do you offer pet urns?
Yes, we provide a range of pet memorial urns designed to honor beloved pets. These are available in different materials and sizes to suit dogs, cats, and other pets.
How do I clean and maintain my urn?
Urns require gentle care to maintain their beauty. Use a soft cloth and mild cleaner for metal or ceramic urns. Avoid direct sunlight and moisture to preserve wood urns. Contact us for specific care instructions based on your urn’s material.
Can I travel with an urn? Are they TSA-approved?
Most Oaktree urns are TSA-compliant, making them safe for air travel. Choose a non-metal urn to ensure easy screening. We recommend carrying the urn in your carry-on bag and bringing the cremation certificate from the funeral home.
How do I track my order?
Once your order ships, we’ll send you a tracking number via email. You can use this to monitor the shipment status. If you don’t receive tracking details, contact us for assistance.
How do I contact Oaktree if my question isn’t answered here?
We’re happy to assist! Visit our Contact Us page to reach us via email, chat, or phone. Our compassionate team is ready to help.

